
In March 2025, we traveled to Paige, Arizona and got to explore some incredible natural landmarks. We drove up for a long weekend trip but we were able to fit in so many amazing experiences! Paige is a small town in Northern Arizona but is filled with some of the most beautiful landscapes! One of the incredible things that we got to explore was Antelope Canyon!
While this blog post focuses on our trip to Antelope Canyon, you can read all about our trip to Paige, Arizona and what we did while we were there! You can also read about our trip just outside of Paige to Kayak Horseshoe Bend!
Antelope Canyon
When planning your trip to Antelope Canyon, it is important to know that there are two options to choose from. You can tour the Upper canyon or the Lower canyon. They are very close together and offer different aspects to admire. Both canyons are beautiful and have incredible views!
The upper canyon is more popular. It is located on ground level and is similarly shaped like an “A-frame”. The lower canyon is a little less popular because it is located below ground. You have to walk down a few sets of steep stairs to get into the canyon. Both canyons are beautiful and you can’t really go wrong in choosing. You could even visit both on the same day if you want! You can read about the differences on this website!
We chose to visit the Lower canyon. We chose it because even though it is deemed “less popular”, we found that most people said it was more impressive. The main reason is that after more and more research, the lower canyon is more popular. It is important to note that you should make your reservation as soon as you know the dates of your trip. Tickets can go very quickly so make sure you get your tickets in advance!
Visiting The Lower Canyon
We scheduled our tour for 11:00 am on Friday morning with Dixie’s Lower Antelope Canyon Tours. They offer both lower and upper canyon tours! We only toured the lower canyon on a hiking tour. It didn’t take us long to get there from our hotel. It was about a 15 minute drive so not bad at all! We arrived about 45 minutes early per the company’s instructions, checked in and explored the gift shop while we waited for our group to gather and begin the tour.
We had a very large group of people on our tour! There were probably close to 100 people that they then split between four guides. We all took turns beginning the tour so we were pretty well spaced for the duration of the tour.
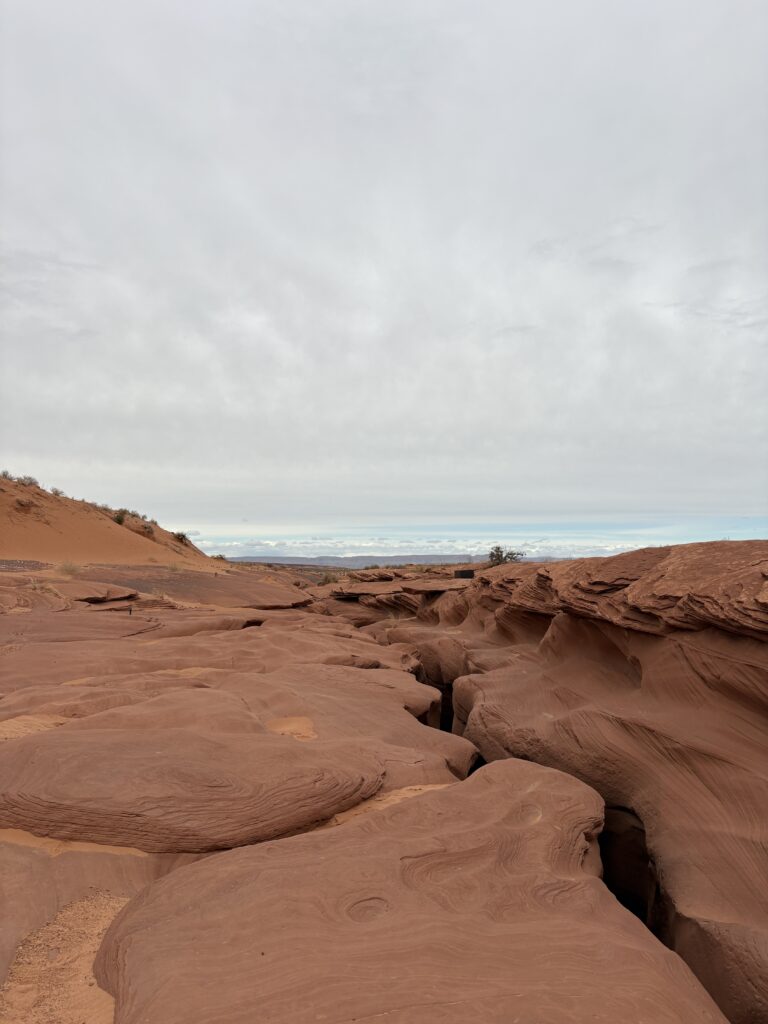
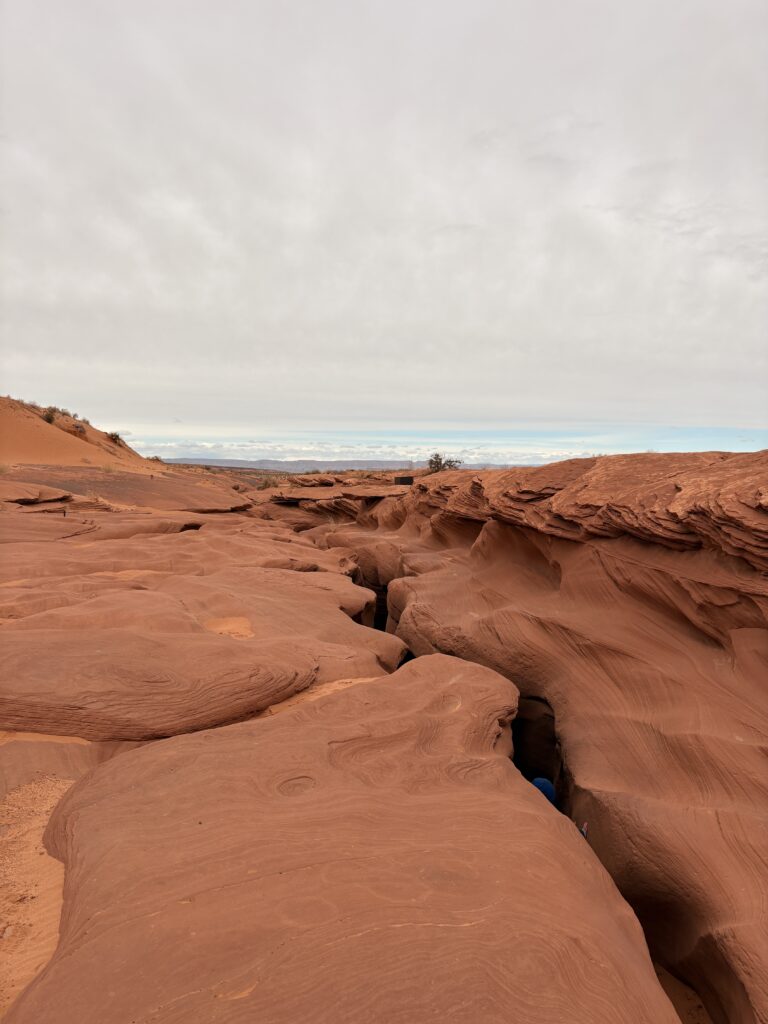
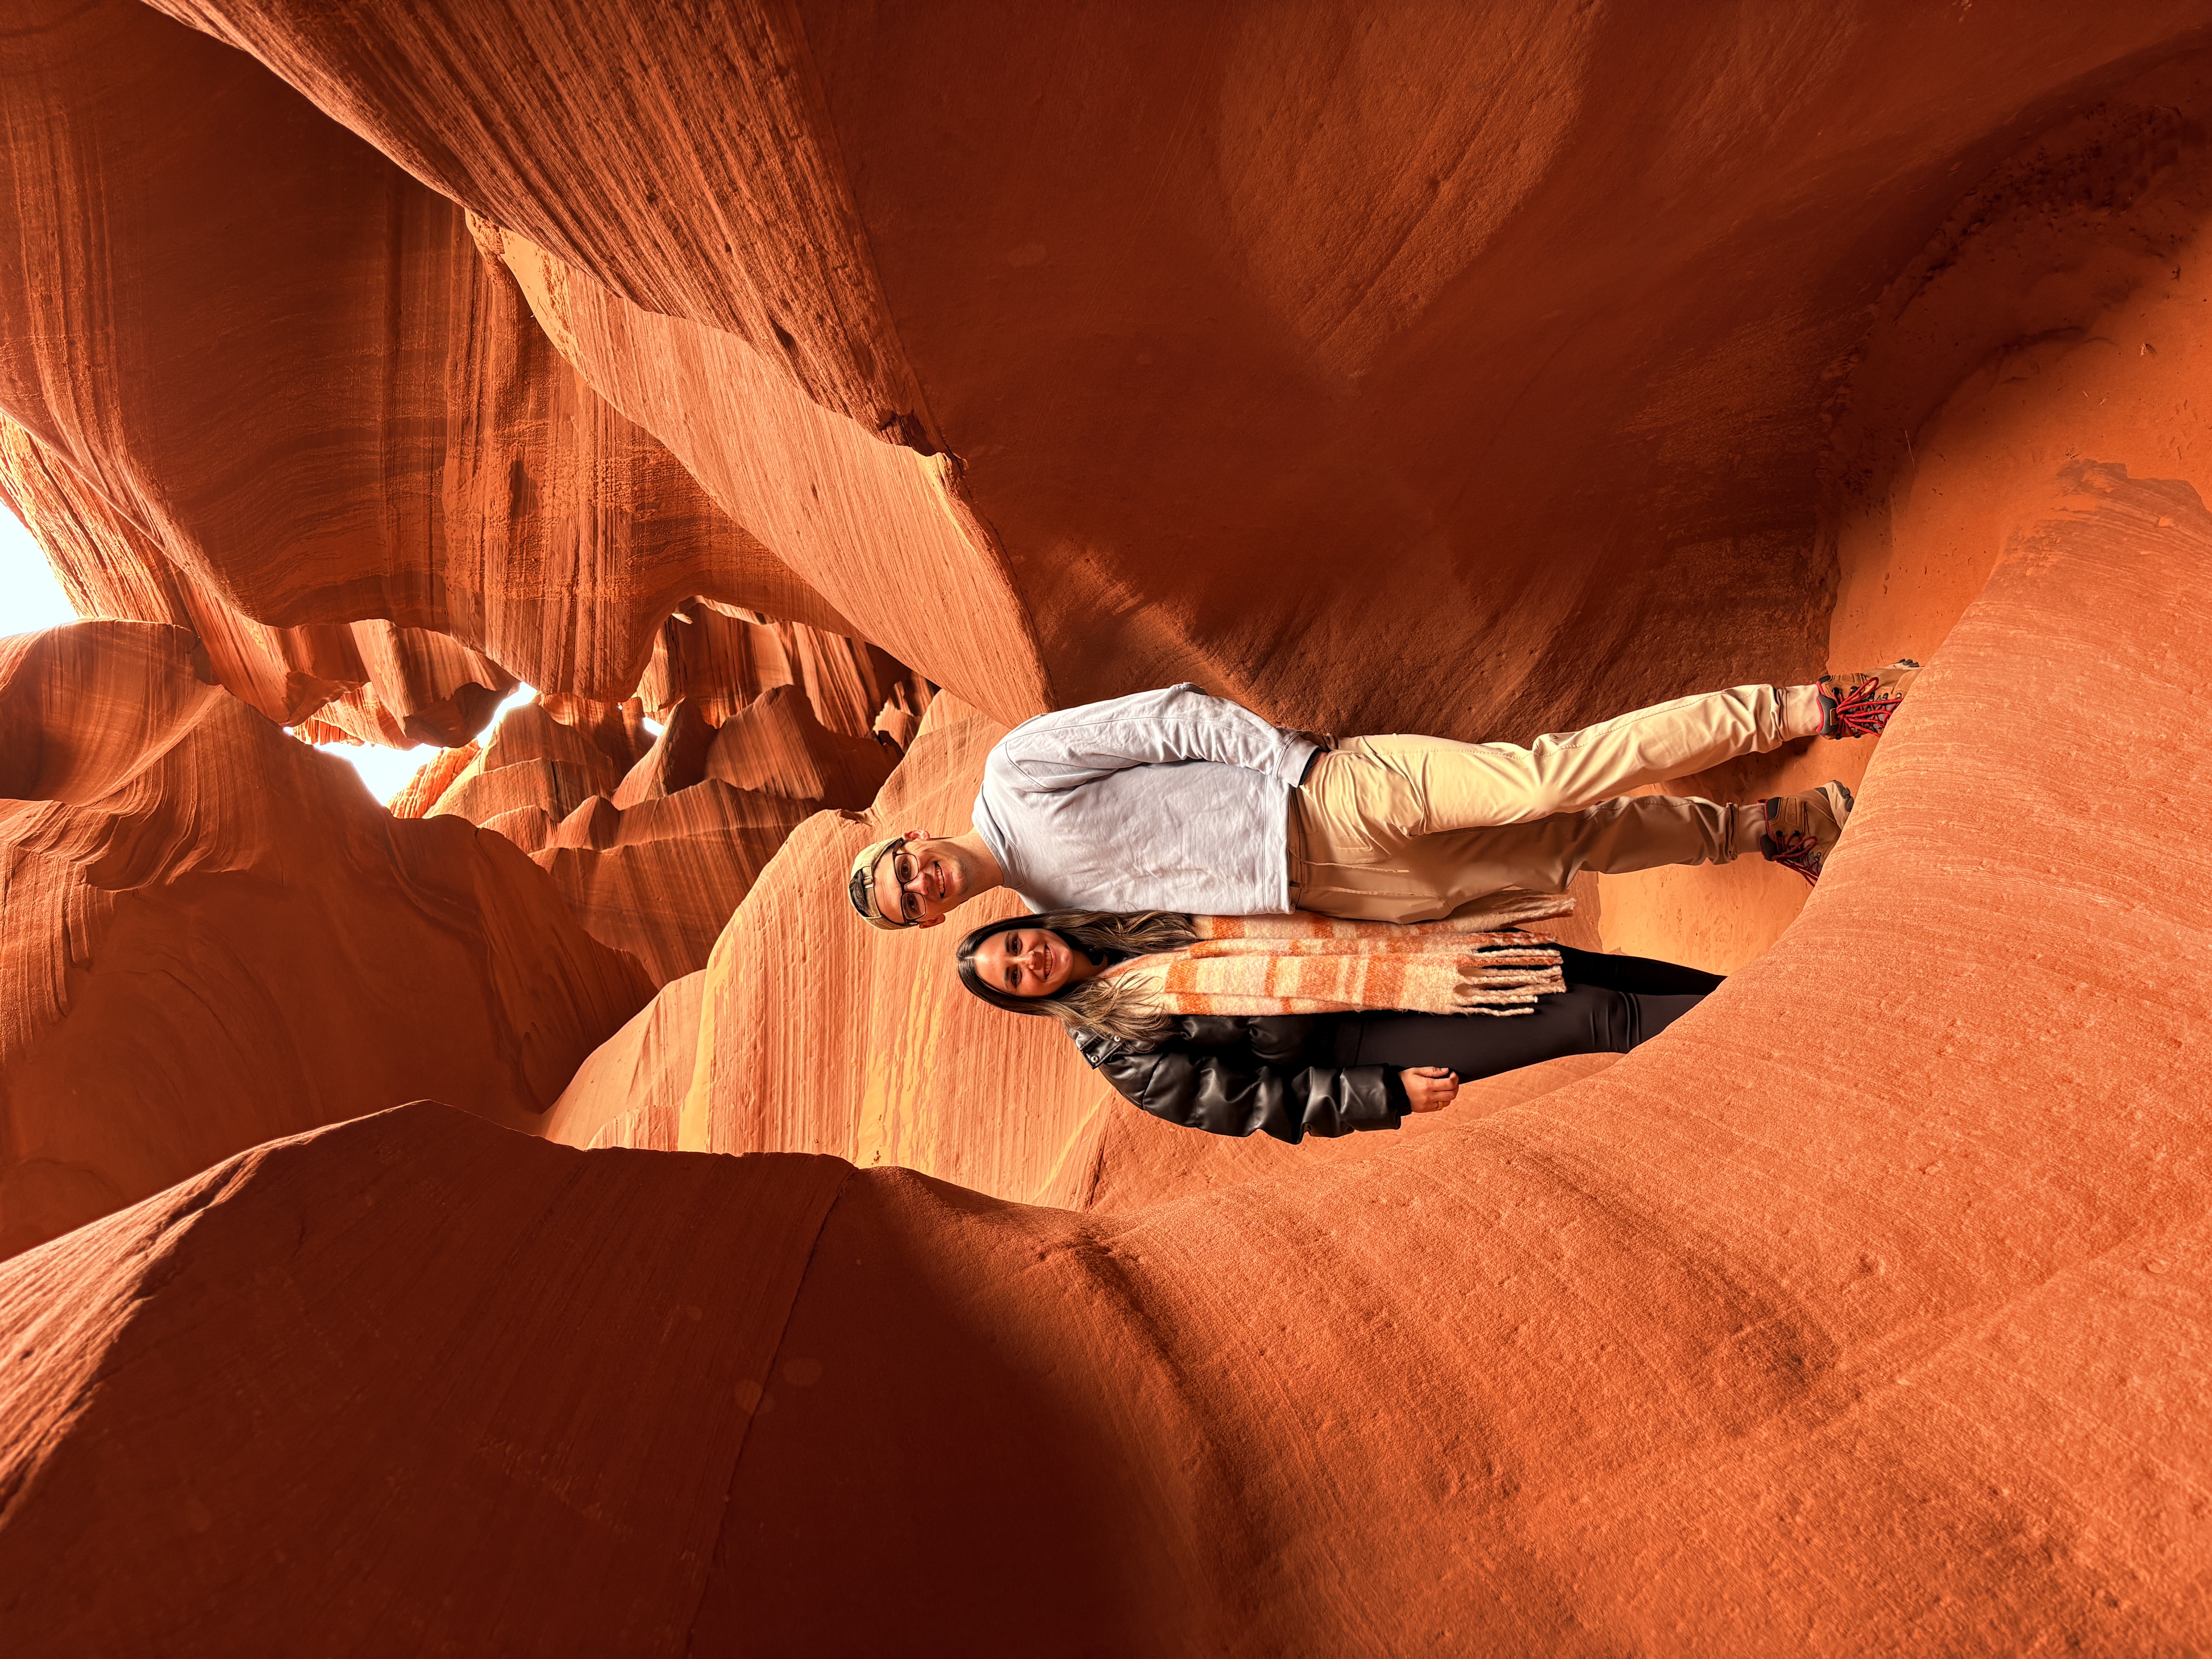
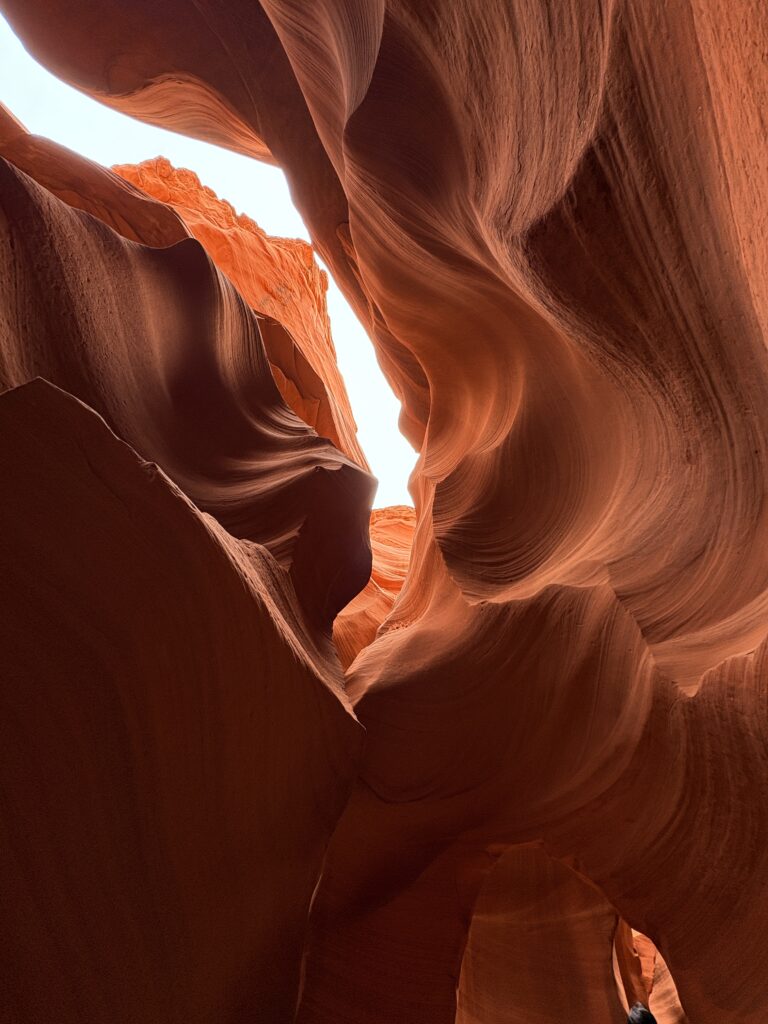
You have a small walk to get to the entrance and I will be honest, the views are pretty much just desert! Trust me, it gets better! This is where our guide explained the history of the land and the Navajo tribe. It was very interesting to learn how they live and how they discovered the canyons and keep them preserved. Photos below are from the exit point of the lower canyon.
The Canyon
Once you get to the entrance, you have to descend about 4 flights of steep, narrow stairs. It’s a little difficult, I won’t lie. If you are afraid of heights or have any mobility issues, take precaution and be careful. You are not allowed to take any photos while on the stairs for safety reasons. You will think it’s beautiful and will want to take pictures but trust me when I say, it gets so much better!
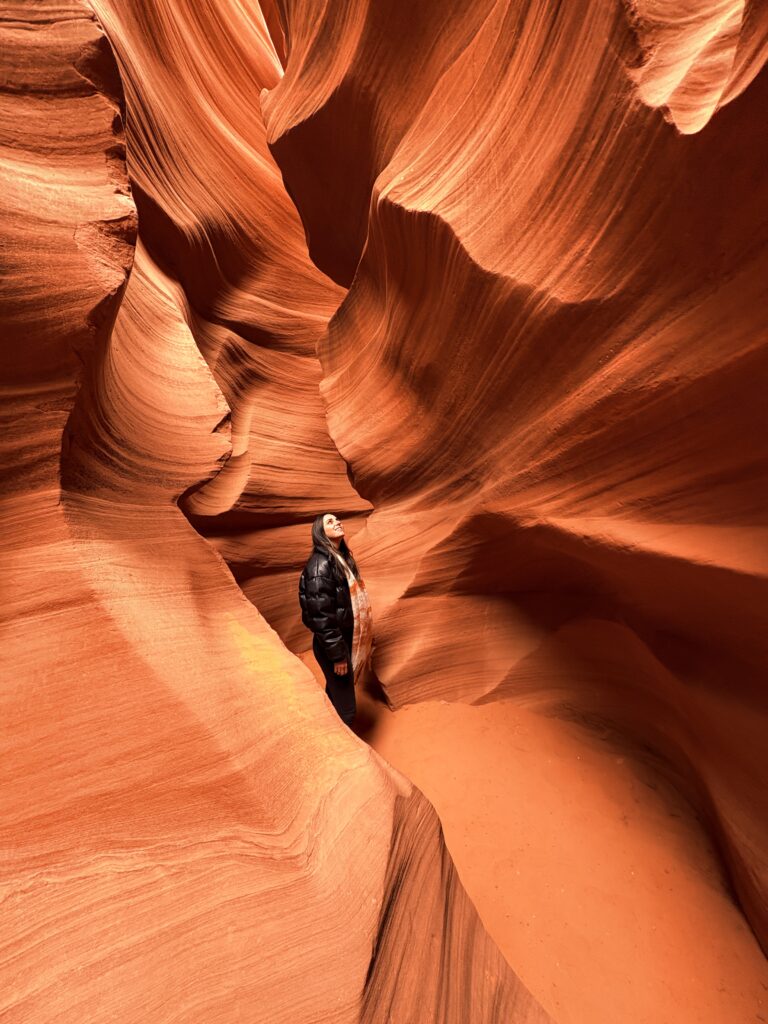
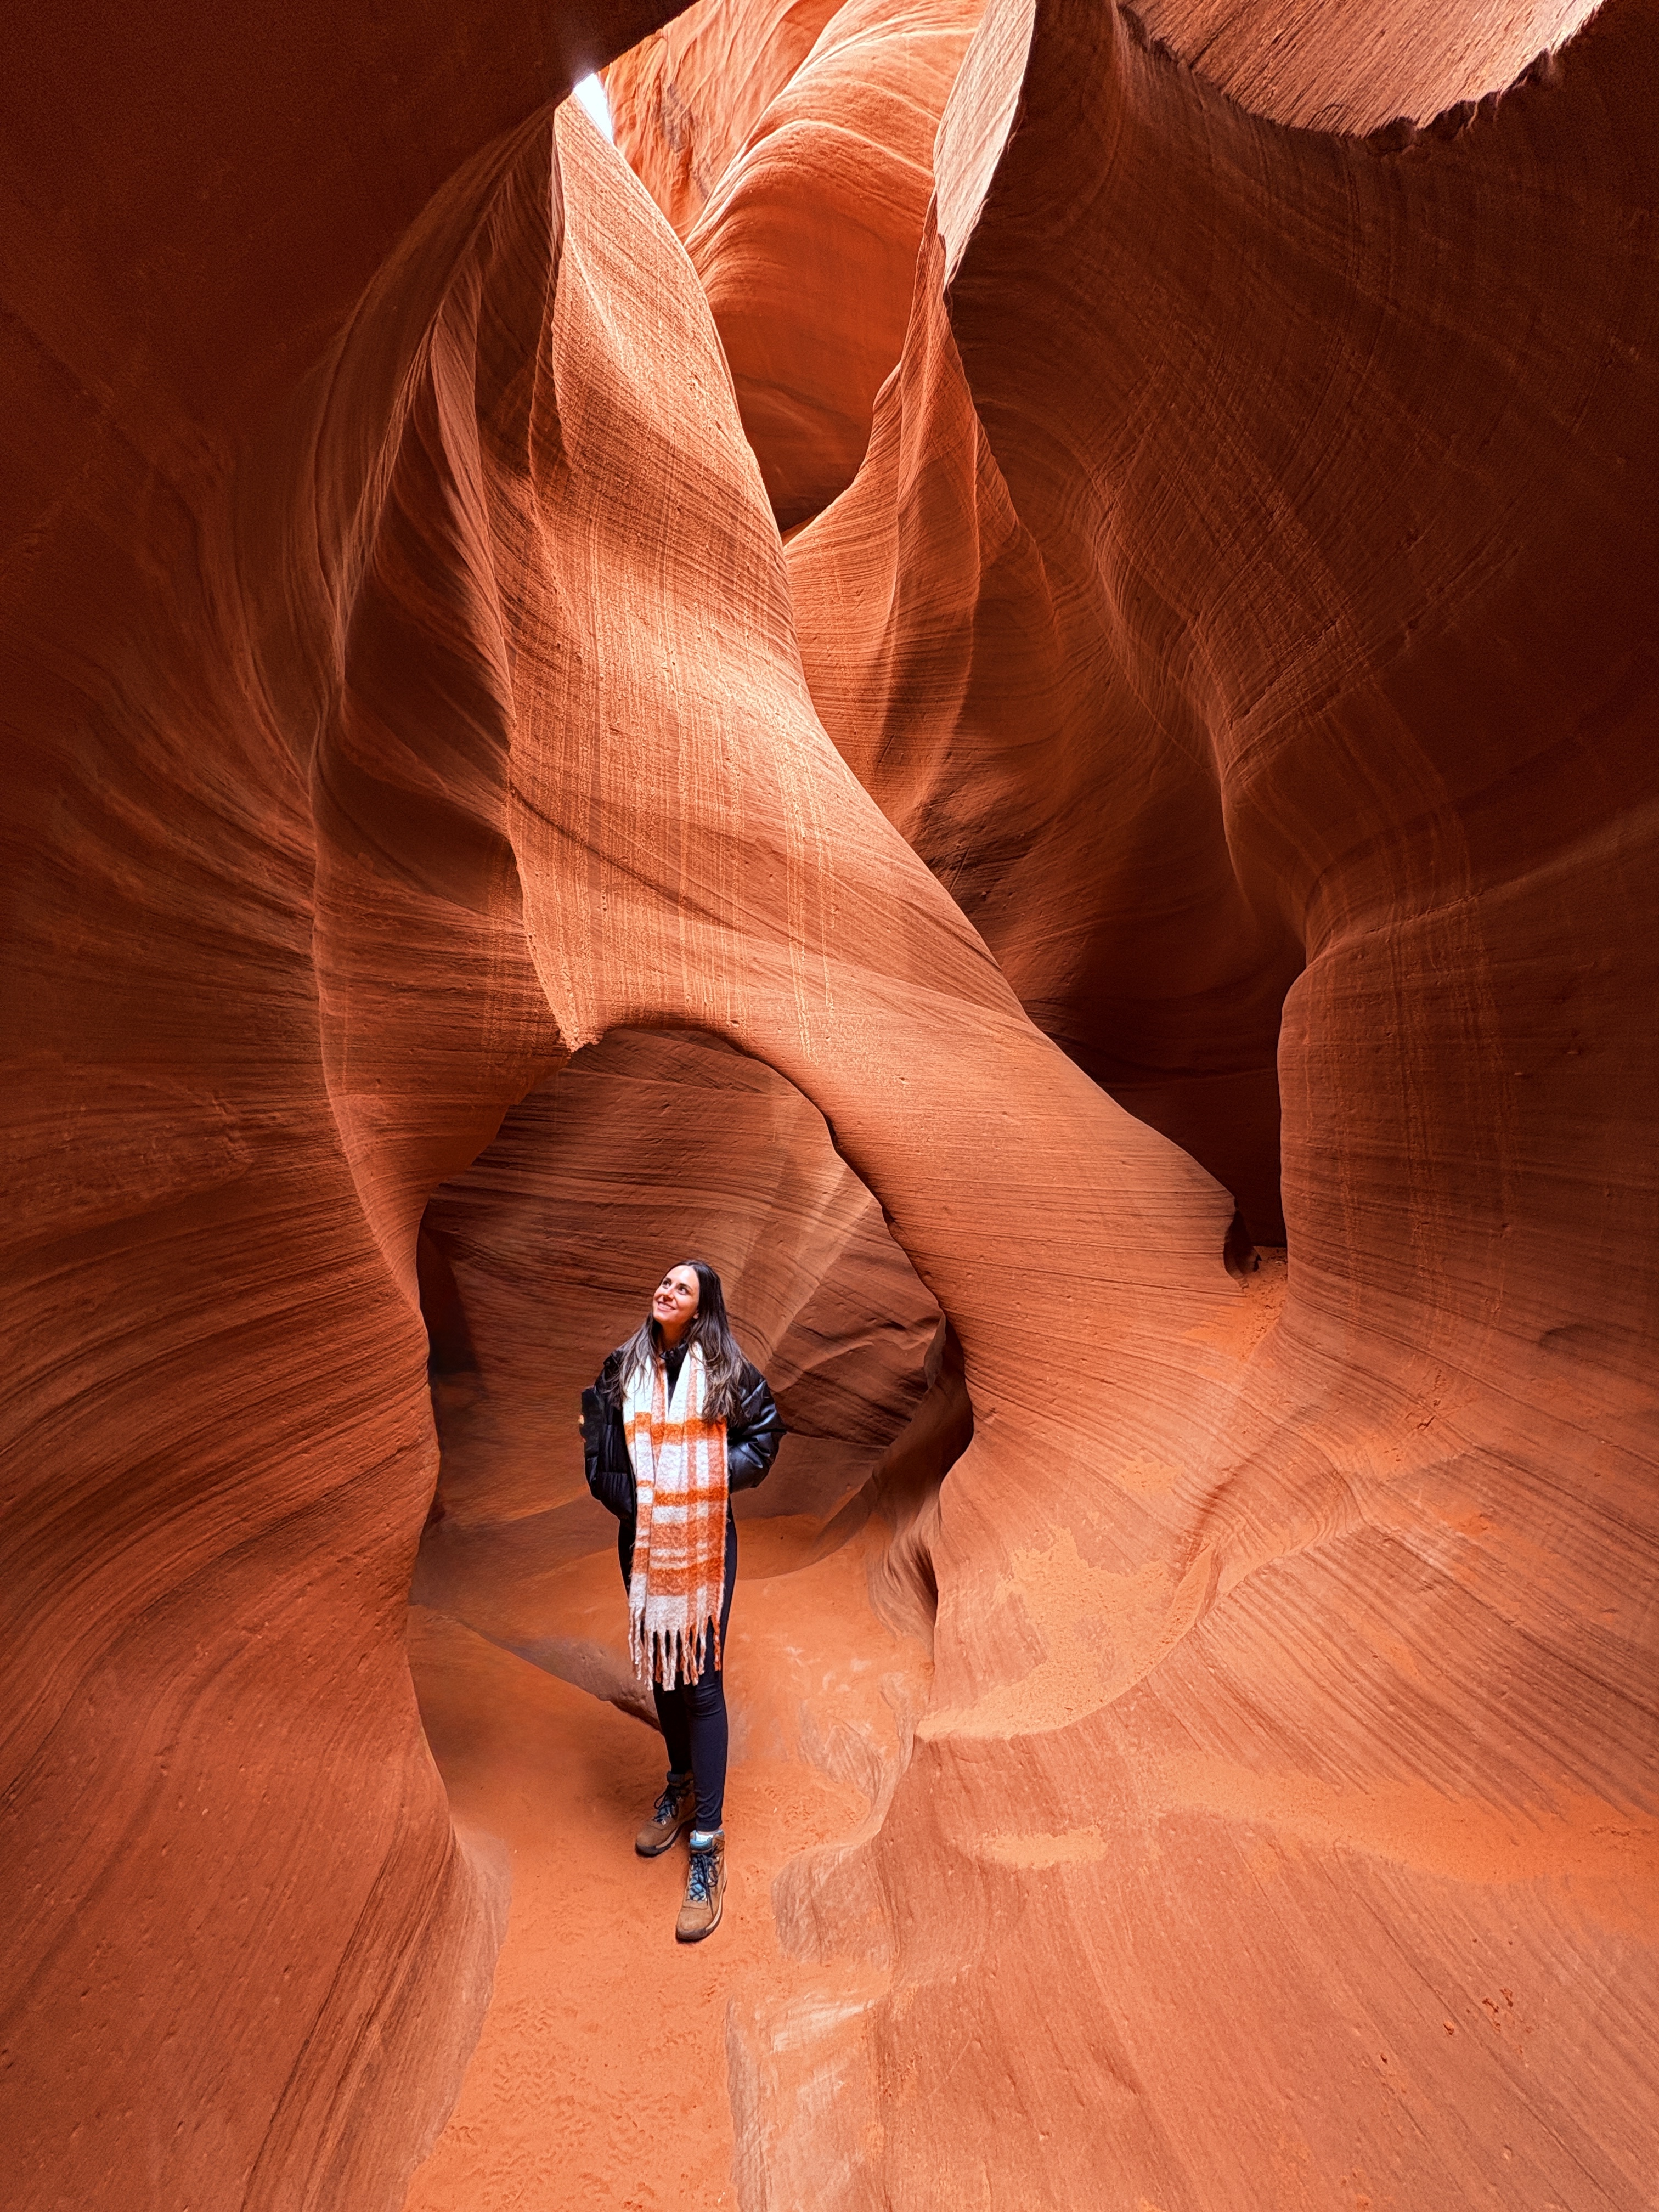
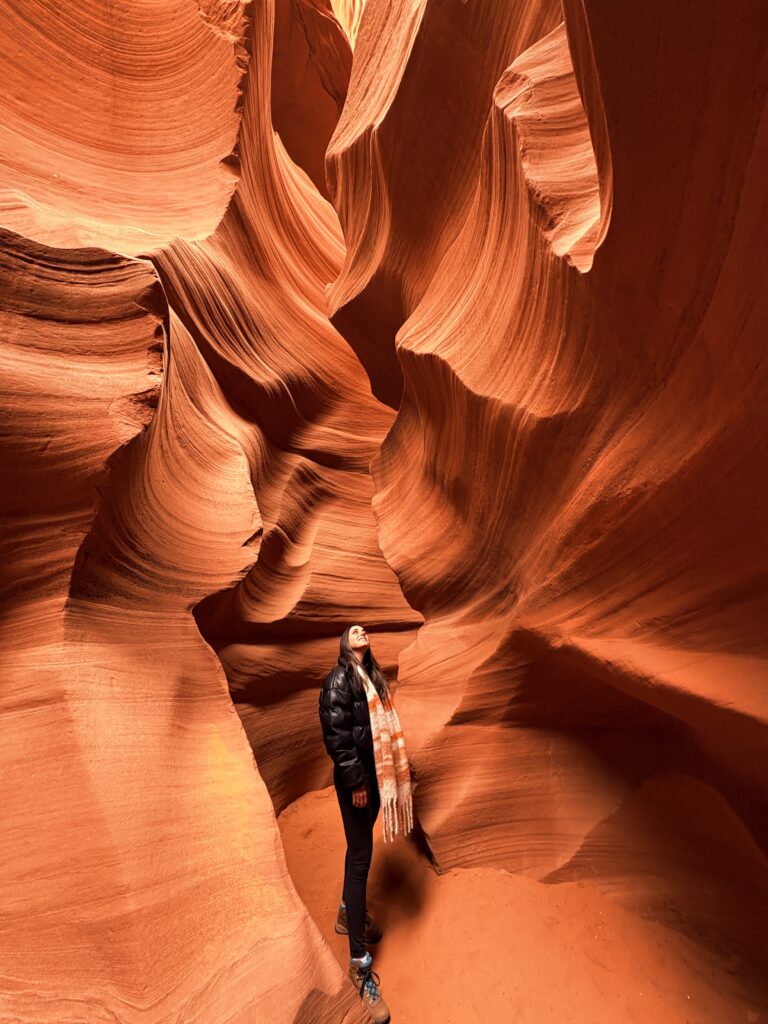
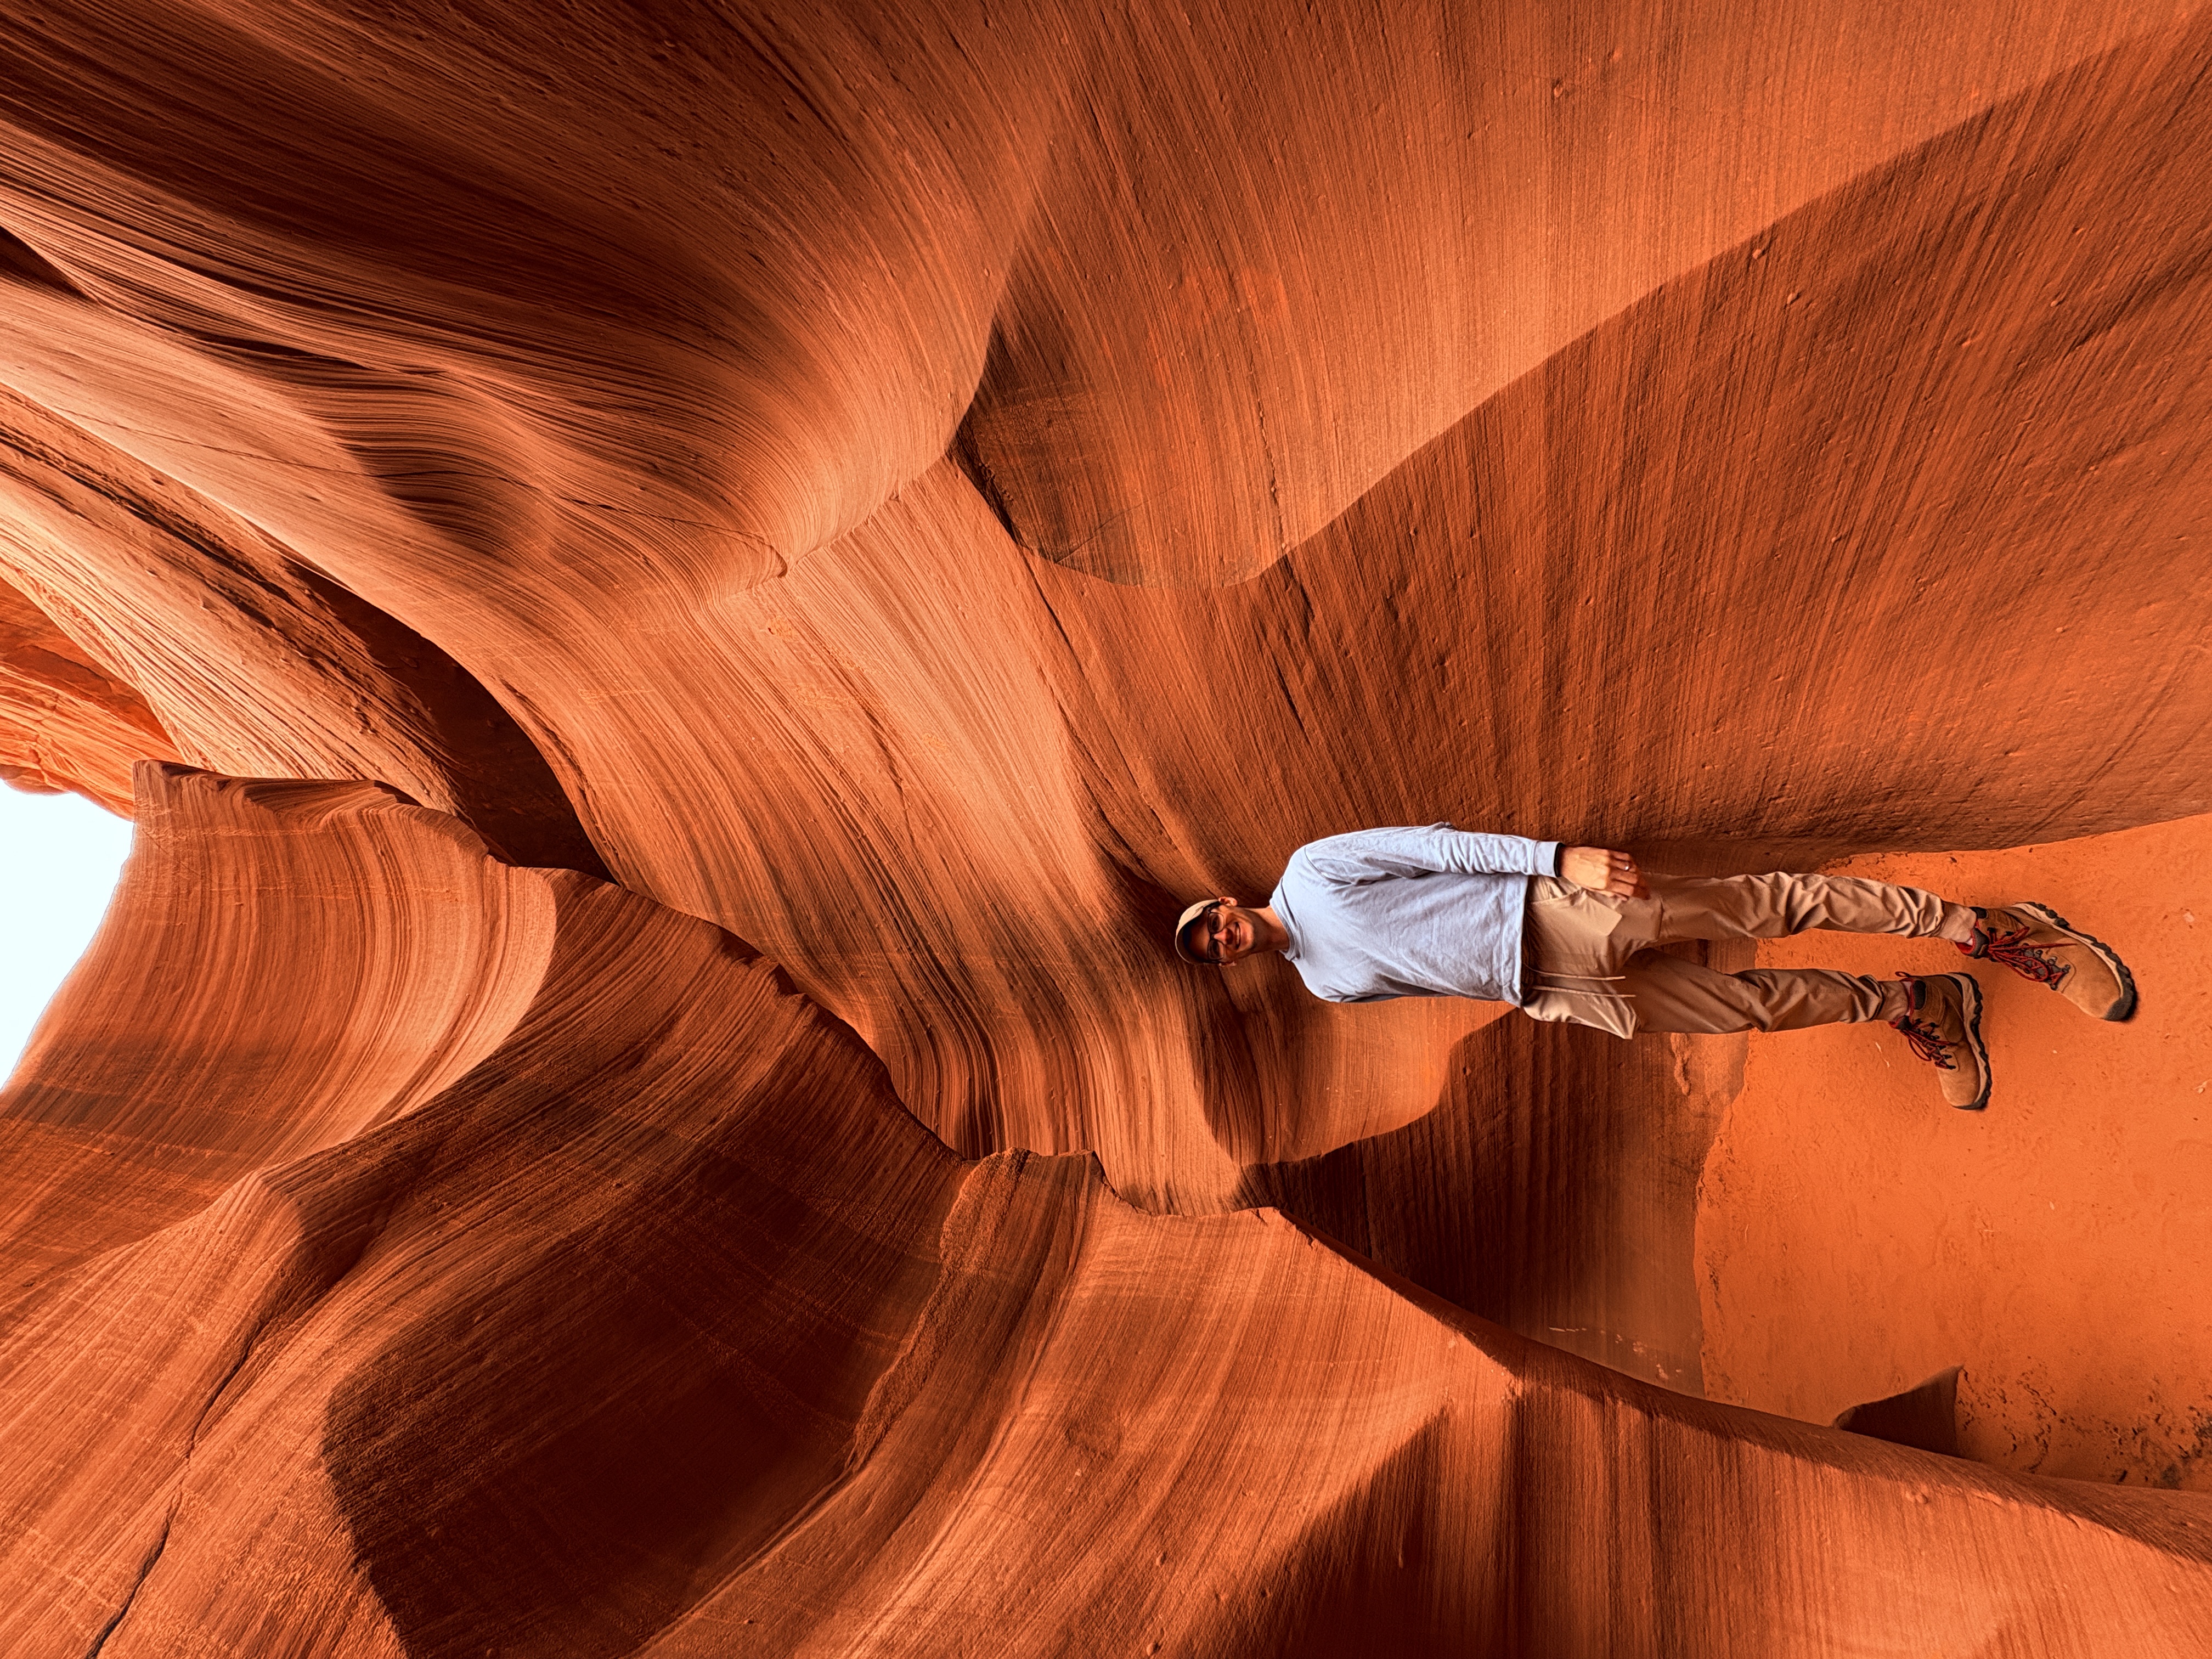
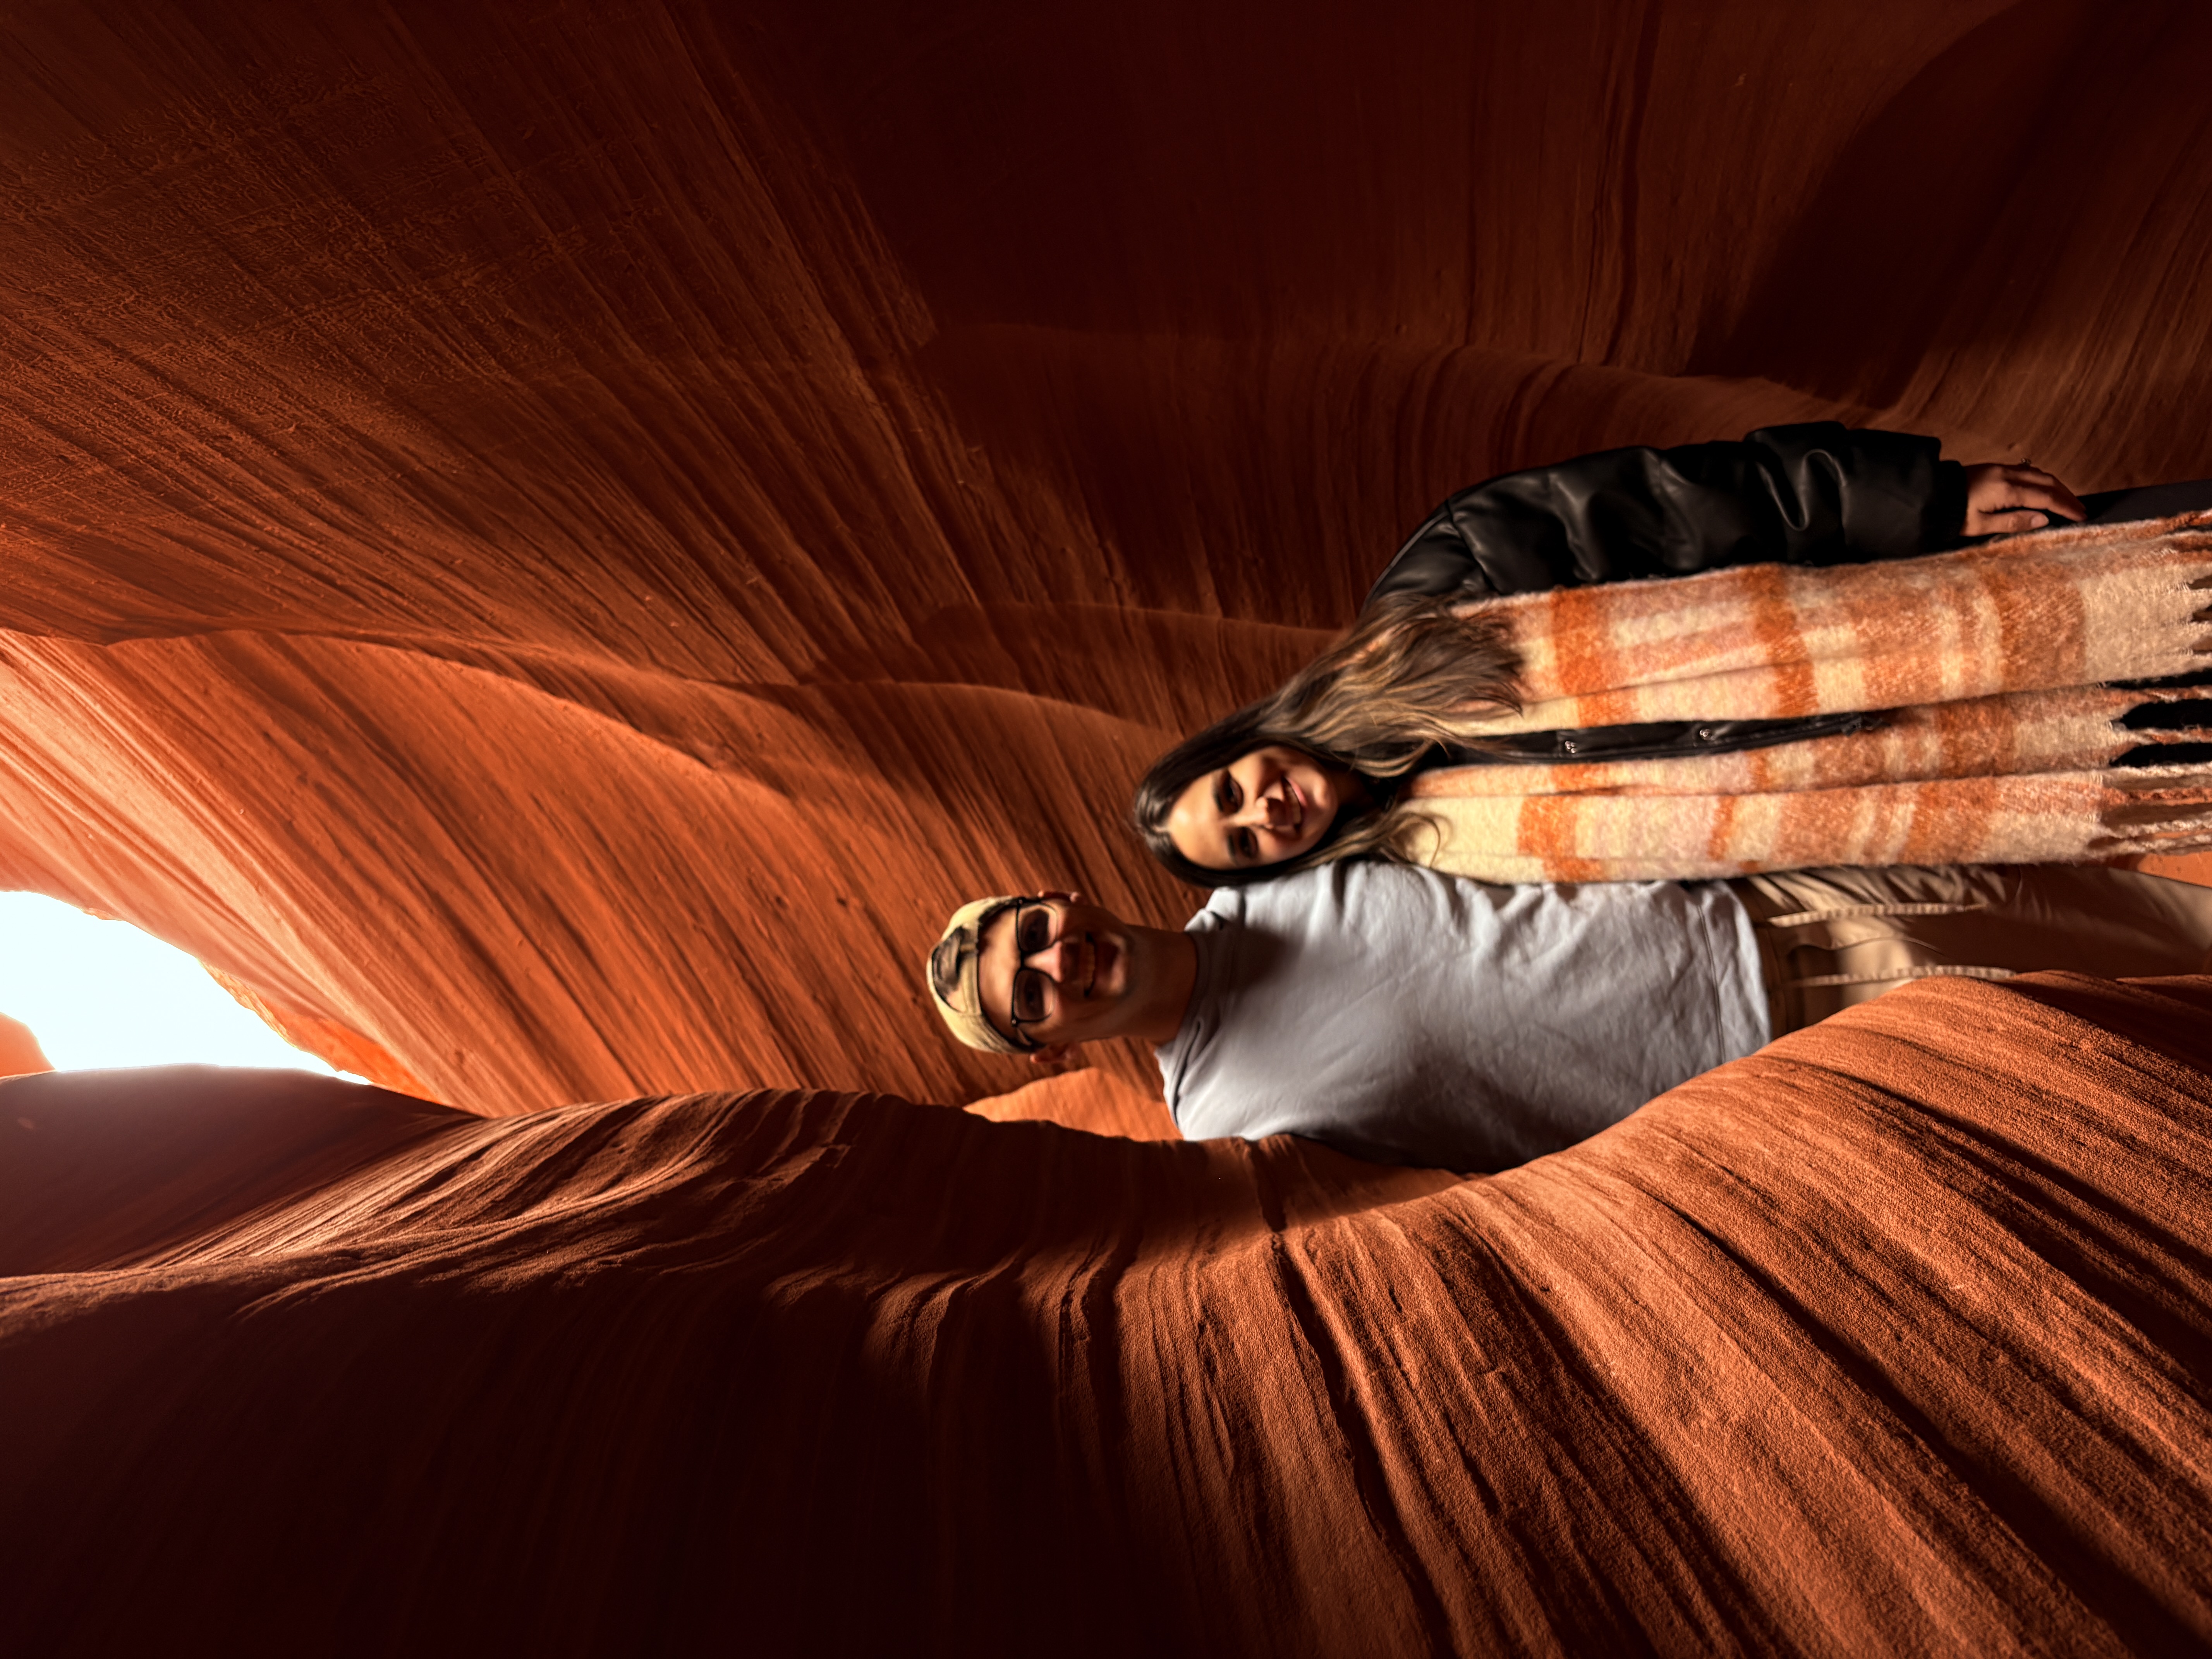
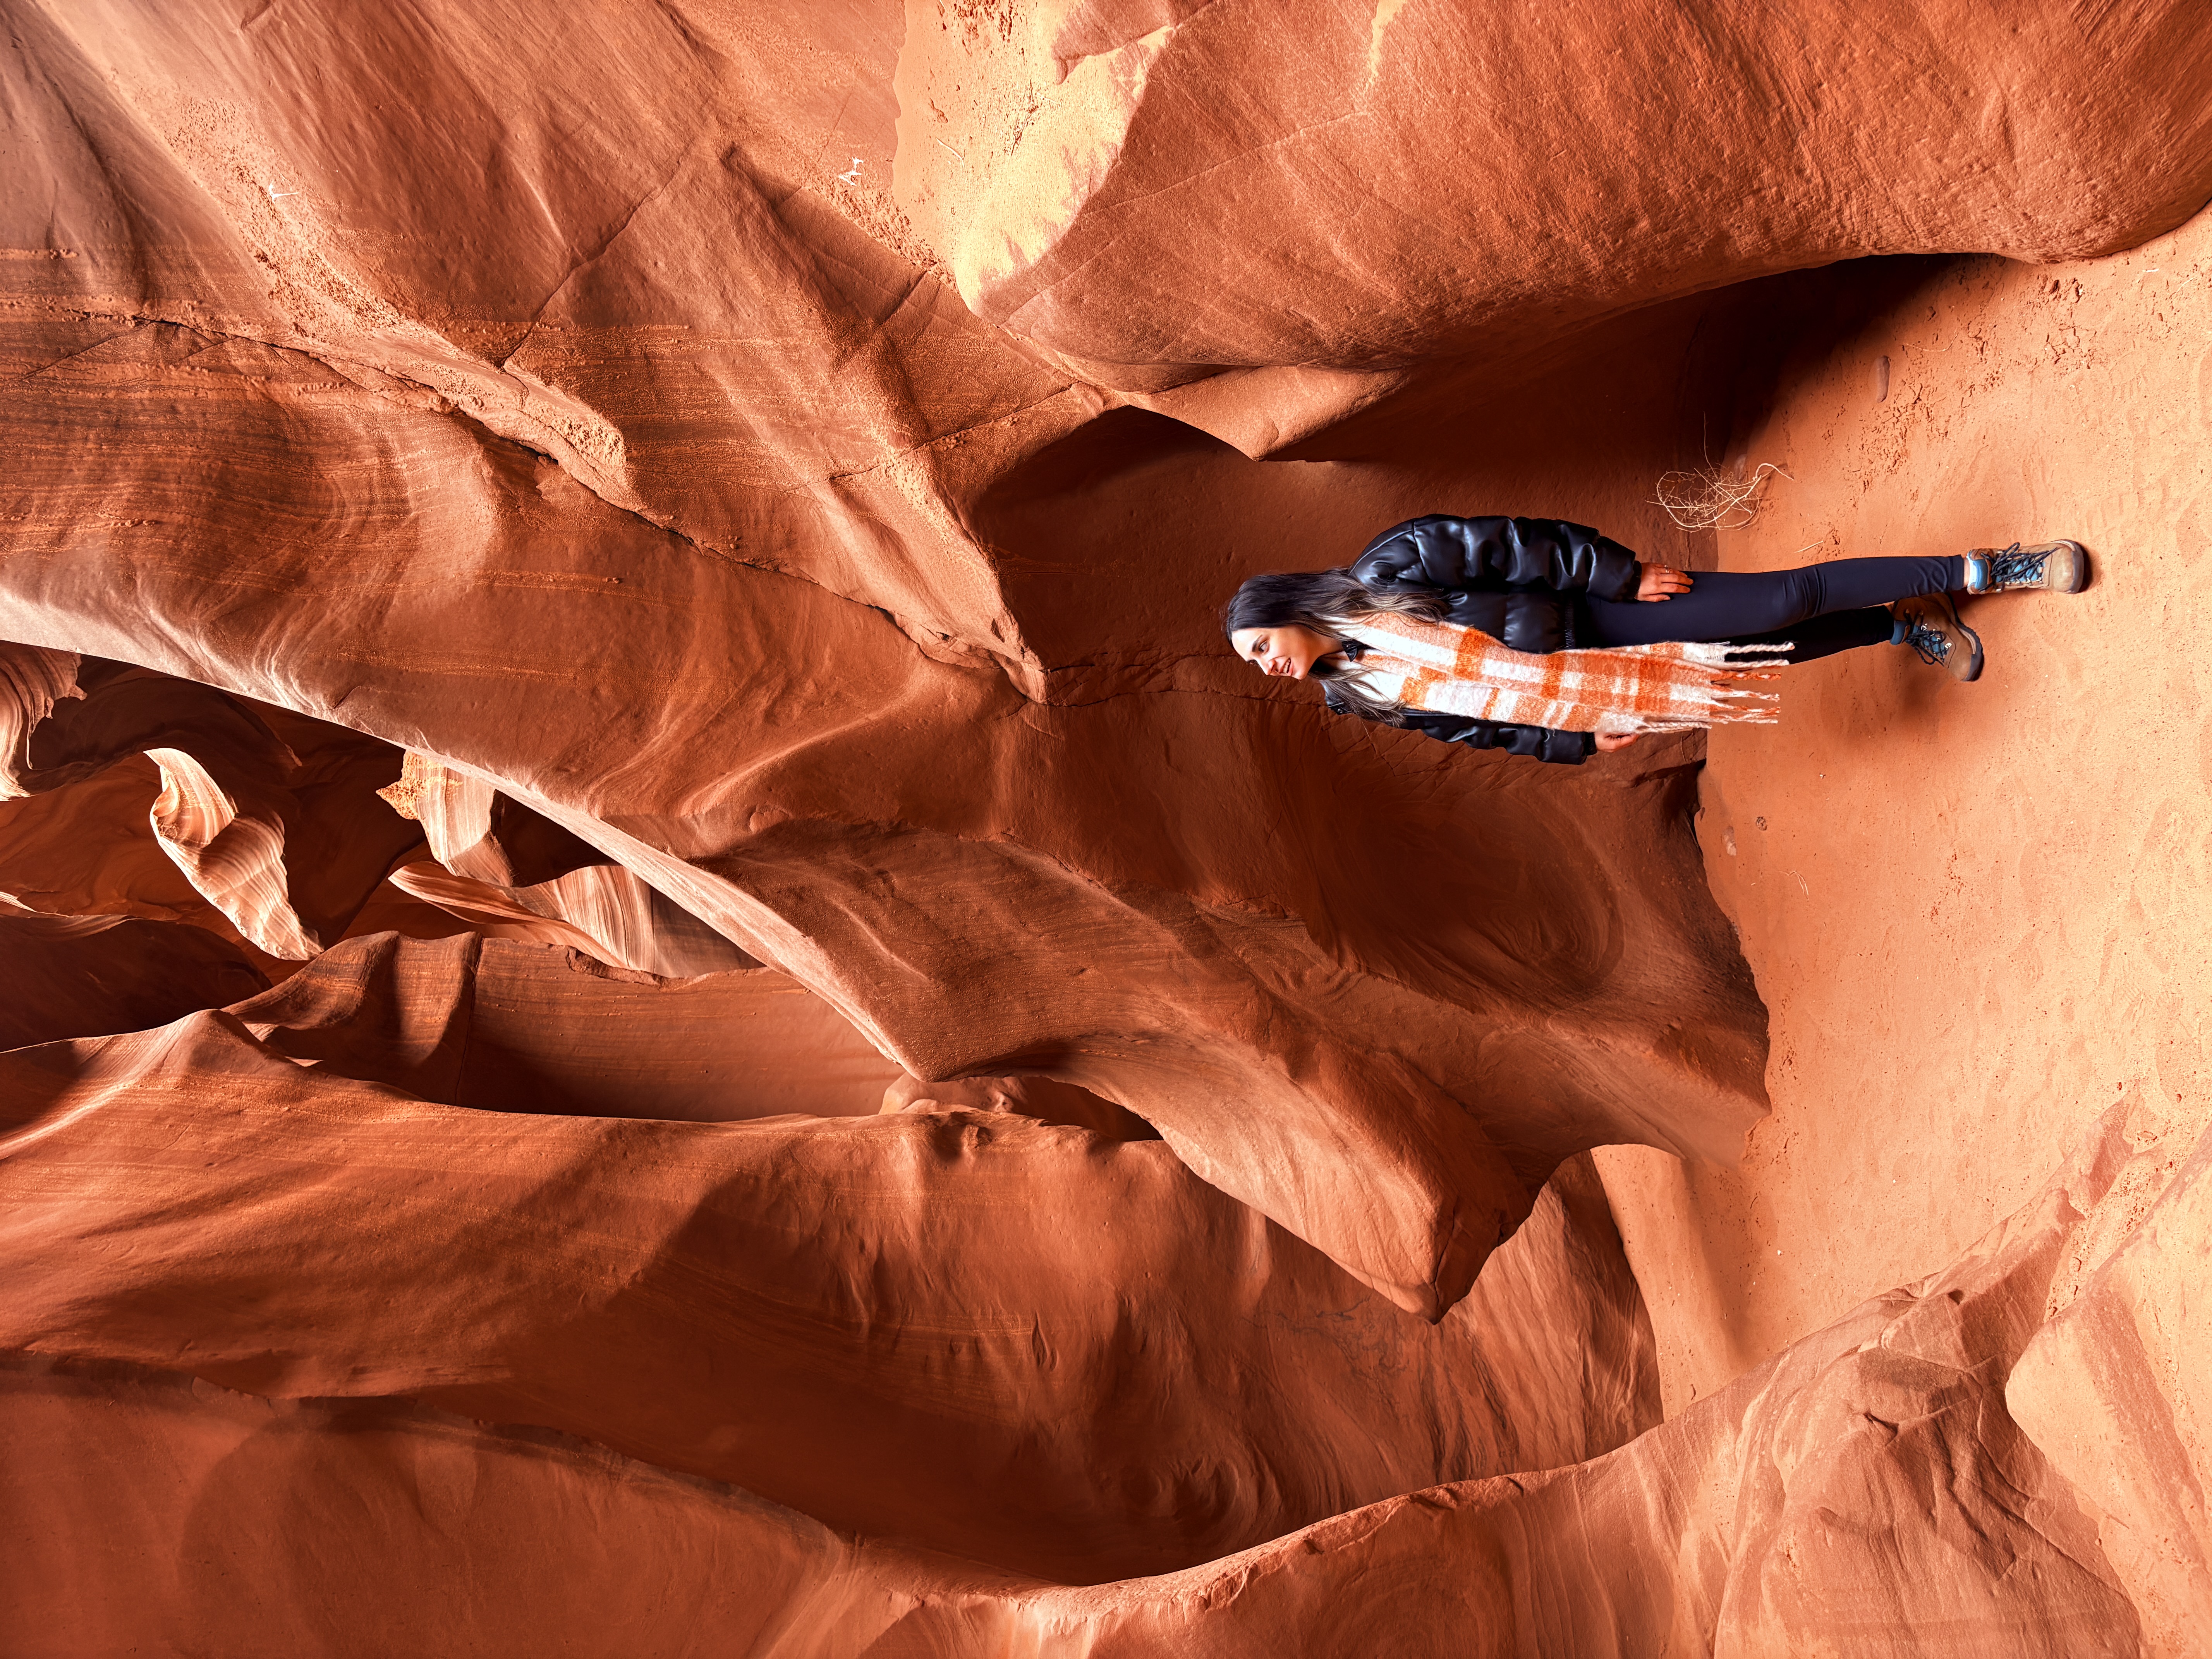
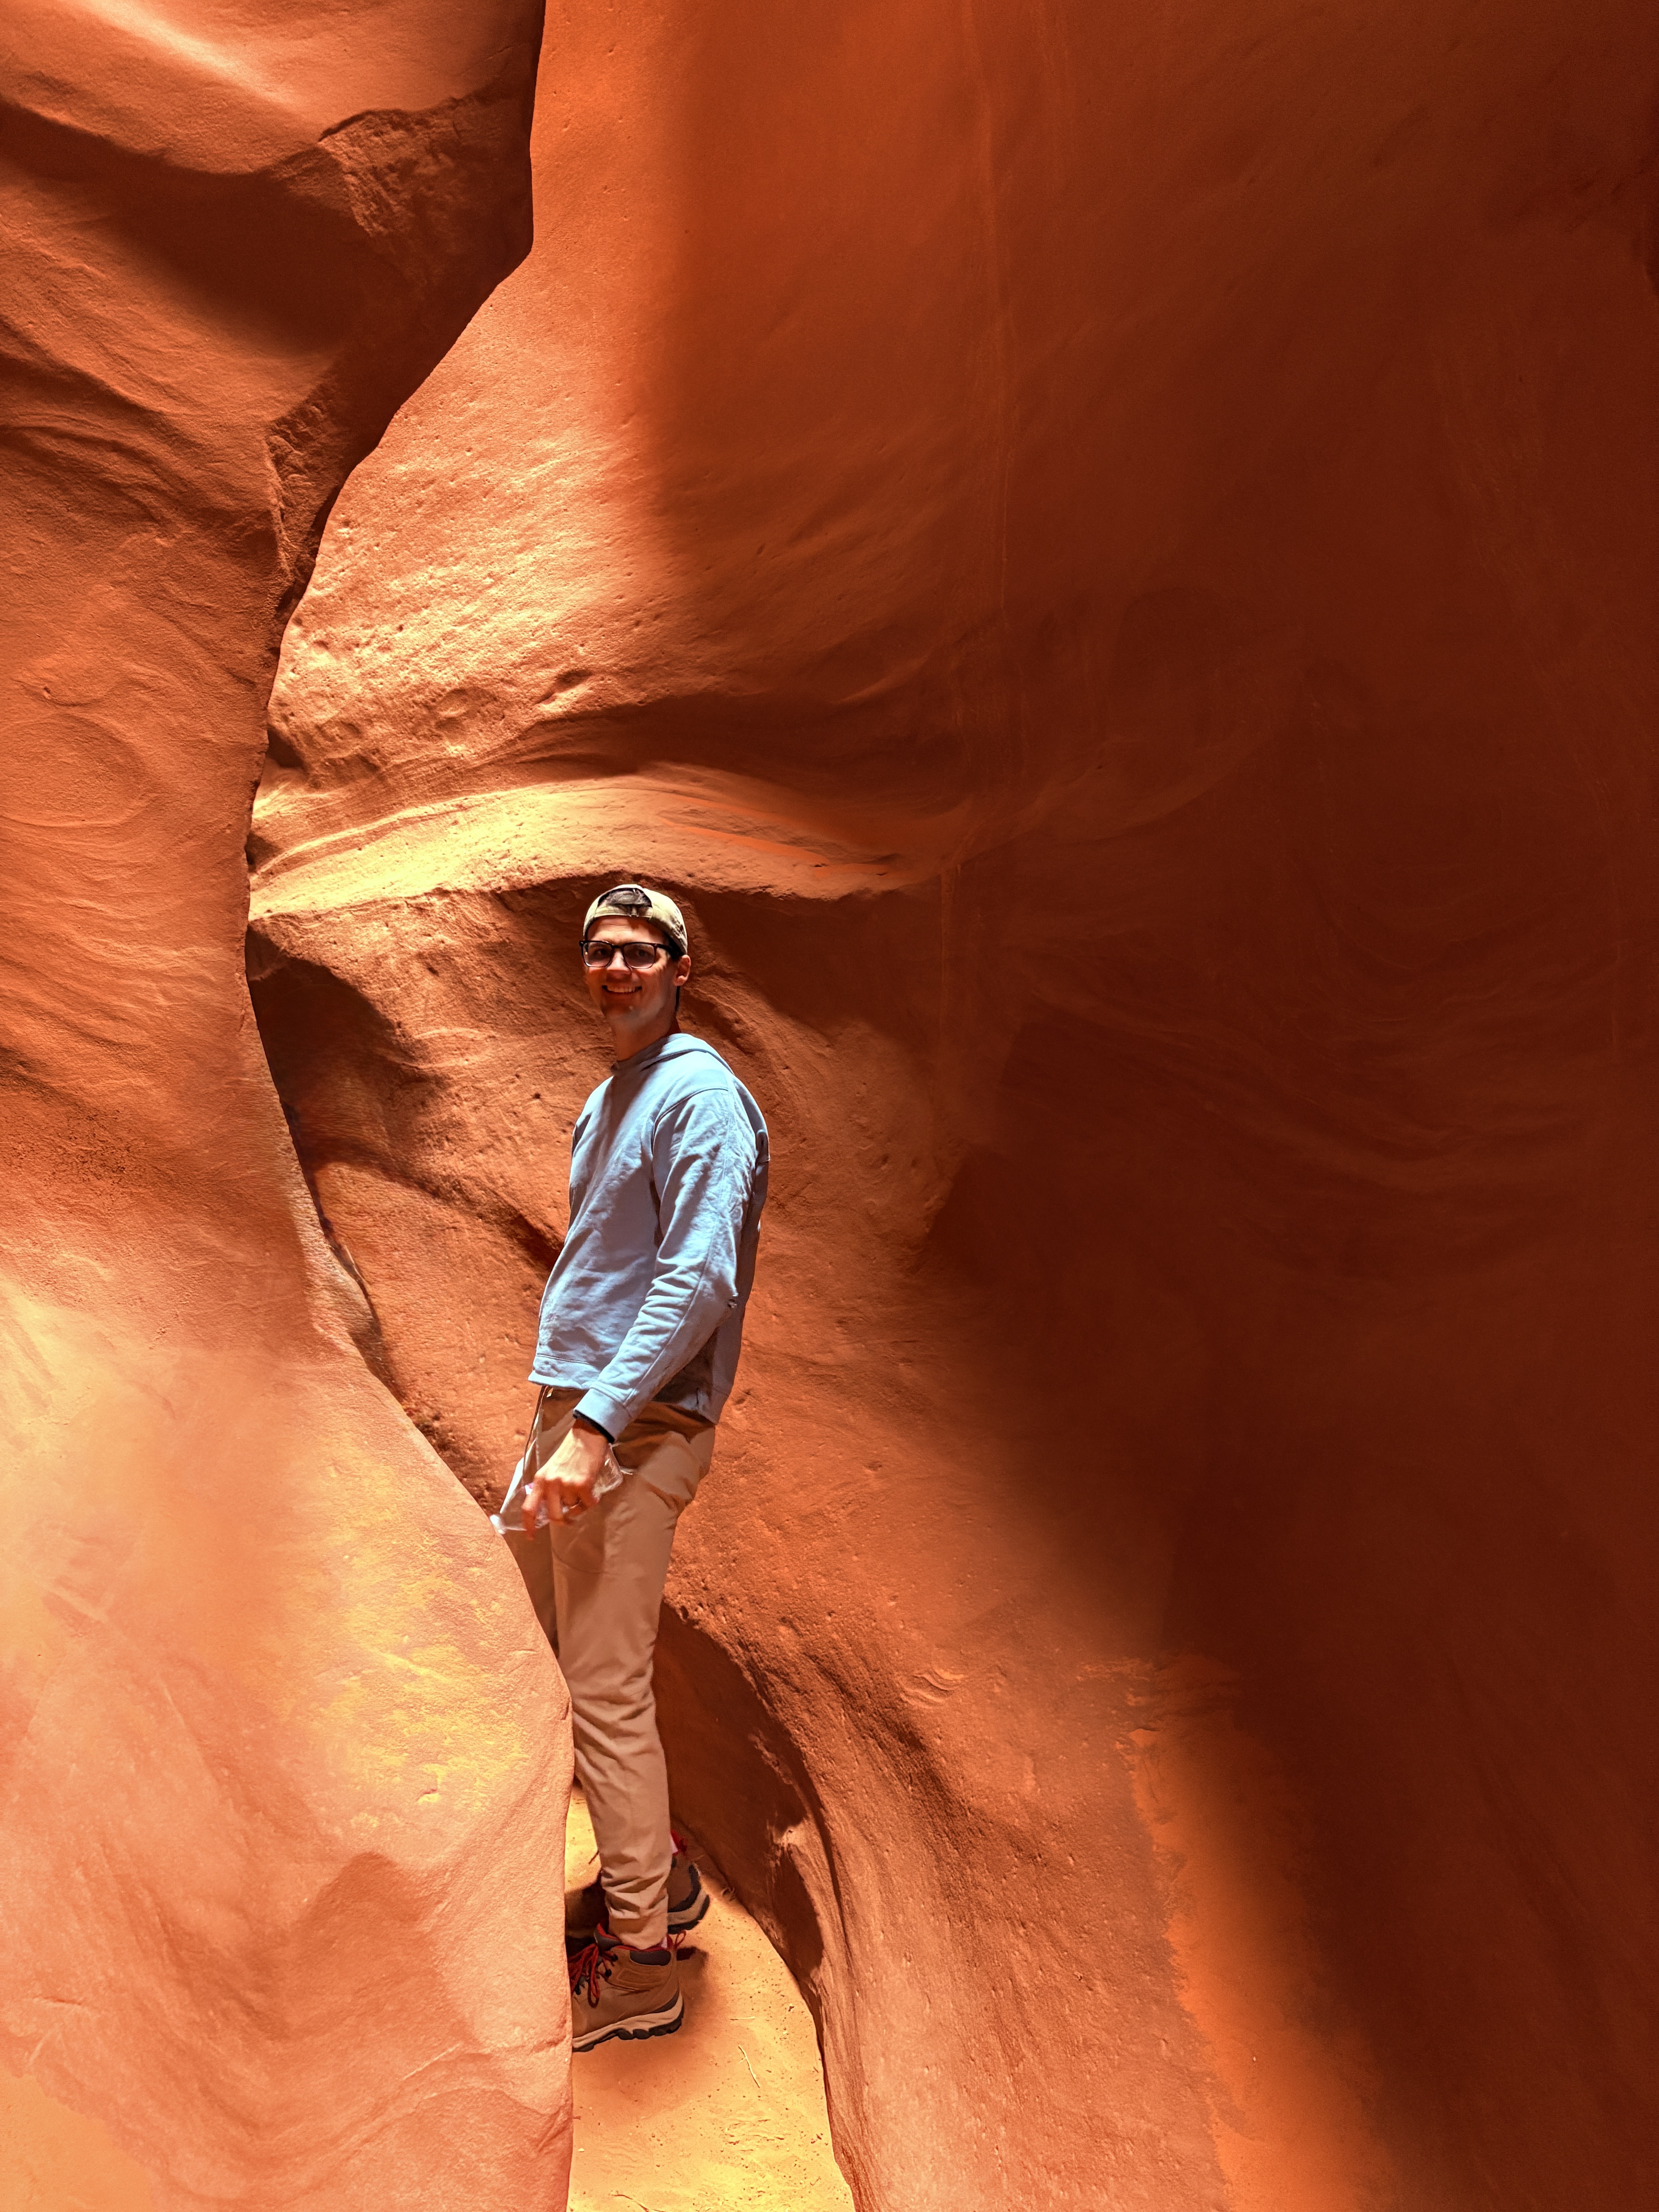
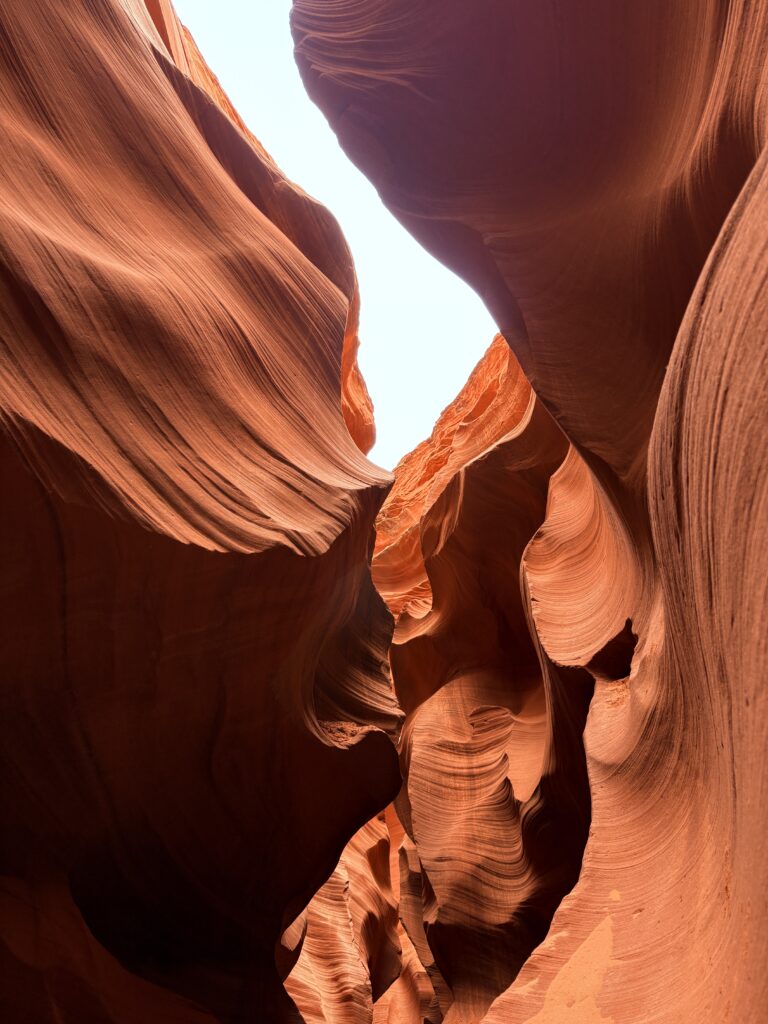
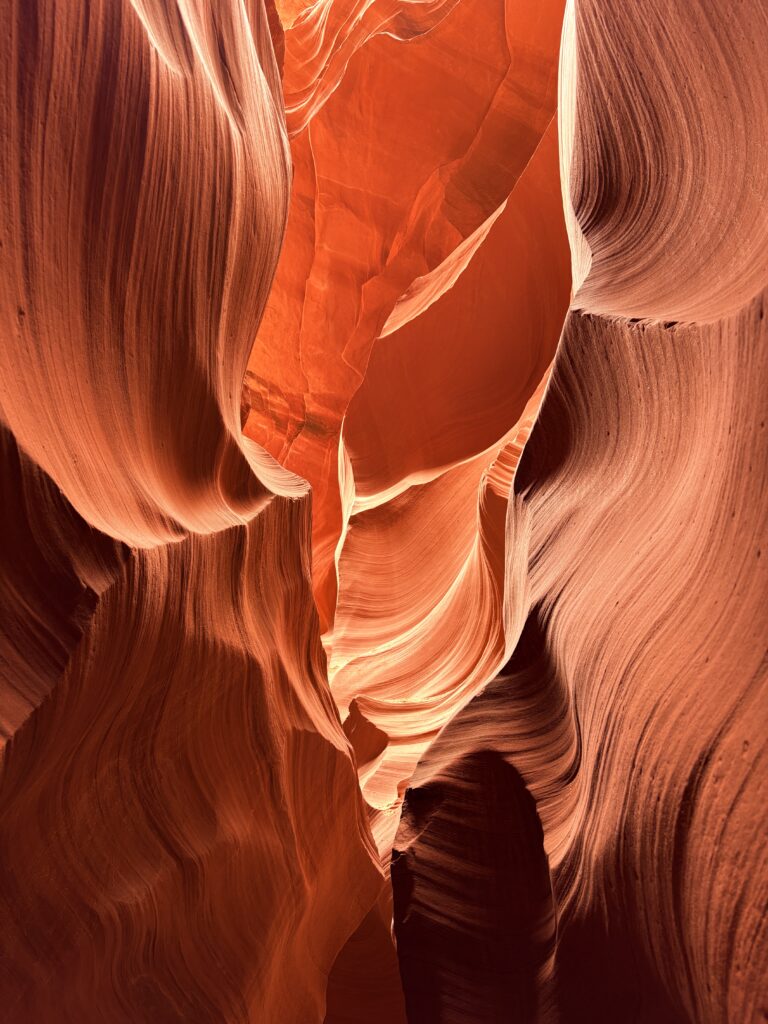
Once we descended into the canyon, the ground is a mixture of sand and rock. Some areas have deep sand but it wasn’t hard to walk through. The walls of the canyon surround you on all sides and are so high but the opening of the canyon lets in so much light! It’s not dark at all and it is so beautiful!
Our group was one of the last groups to descend which I loved because there were not a lot of people trying to rush us. The guides explained to us how the canyons were created and when they believe the erosion started. You learn so much about the history of the area and the Navajo tribe and exactly how they preserved the canyons for us to enjoy today!
We were in awe of every area of the canyon. There are some areas that are open and spacious but then other areas that are very narrow and a little tough to navigate if you aren’t paying attention. Our guide was so helpful in pointing out famous lookout points or popular photo spots.

What To Know Before Visiting Antelope Canyon
Photos
The lower canyon only allows you to take photos. You are not allowed to take any videos and it is strictly enforced! Because of the narrow pathways and amount of people in each tour group, they don’t allow videos for safety reasons.
We took all of our photos on our iPhones! Our guide actually changed the settings on our photo app to help us get the most beautiful pictures. First, take your photos in .5 to get as much of the canyon as possible in each photo. Then, I highly recommend changing the settings to the “Amber” setting. I have listed how to change the settings below:
- Open your camera app
- In the top right corner, there is a square icon. Click on that icon.
- At the bottom of your camera, you will see the setting that you are currently on. It will most likely be standard. Swipe to the left until you find the Amber setting
- You should be good to go once you find the setting!
Once you are in the canyon, you will see how it enhances your photos! If you don’t change your settings, the photos won’t do it justice. The canyon is extremely beautiful and full of vibrant colors! Below are some of my favorite photos of the canyon itself.
What to wear
We visited in March and the weather was unusually cold! The temperature was in the 30’s so we were bundled up! It was extremely windy when we visited which made the walk from the building to the entrance of the canyon very cold. However, once we entered the canyon, the wind was gone and it was just chilly!
When trying to figure out your outfit for visiting the canyon, keep these things in mind. First, this is a natural canyon that has natural elements such as sand, dirt and rocks. Second, the weather can vary which means it can be cold or hot and it can even begin to rain if you visit during monsoon season.
Closed toed shoes are a must. Between the stairs and the sand along the canyon floor, it is important to wear shoes that give you stability and traction. We wore our hiking boots and they worked very well! I would also bring a jacket. Depending on the time of year will determine if you bring a light or heavy jacket. Once you get into the canyon, it can be chilly since you are in the ground. Other things to consider bringing are sunscreen, a hat, gloves and warm socks (if it is cold).
Physical Aspects
The actual tour of the lower canyon is not difficult in my opinion. The hardest part is the stairs in and out of the canyon. They are very steep and narrow so you have to watch your step and not rush through them. We had several kids on our tour and they handled them just fine! You just need to take your time.
There are a few narrow parts throughout the canyon. It can be very tight in some areas. There are also a few boulders that you have to climb over throughout the tour. While we were able to navigate them just fine, I think it’s important to point that aspect out.
My Final Thoughts Of Antelope Canyon
If you are thinking about visiting Antelope Canyon, I highly recommend it! It is an hour-long tour that will show you such an incredible natural landmark that you can’t see anywhere else. Everywhere you turn is a beautiful view and it is amazing to not only see it but to walk through it!
If you enjoyed reading about this trip to Antelope Canyon, make sure you check out a few of my other blog posts from unique trips like hiking Angels Landing and glamping in Zion National Park! Or, check out my most popular travel guide, our experience on the Amtrak Coast Starlight! You can check out all of my travel guides and blog posts here!
One Comment